In the Inventory module, to view or edit a record click its title or its image.
To add a new record click “New”.
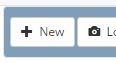
Alternatively, if you have several images ready, each intended for a new record, and preferably all in one folder, you can click “Load”

For more information on this “bulk load” function see the separate article on this subject.
Each inventory record has several tabs of information. Please note, if you are using an Artlook Template web site, the fields with labels in green are those that will appear on the site.
Some comments follow regarding specific fields.
Medium. The medium is populated from a drop down list. You define your list in Settings. However you can add a new item here as well (not recommended).
Category. As per Medium.
Subcategory. As per Medium.
Tags. As per Medium. In addition, Tags is a multi-dimensional field – you can attach as many tags as you like to a record (and use them as filters later on).
Dimensions. When you fill in dimensions (numeric only please), the field Dimensions as Text will auto-fill. You may of course edit the result. This field is used in reports and on web sites.
Date. Where a date is approximate, or contains non-date characters you can use the box to the right description of when produced. (For examples, “c1932”, “between 1970 and 1975”, “1980s”, etc).
Description. This field includes a mini editor allowing you to make typographic emphases (bold, italic, font-size) or include hyperlinks. These would be used on a web site.
Reference, International Reference and Long Reference. These fields are provided so you may use your own reference numbering system. Artlook will give all records a unique Artlook number as well.
The “Transactions” or “Items” tab (If you have the Studio Professional edition it will be the Items tab)
This tab will enable you to transact the item. If you have the Studio Professional edition it will also enable you to turn the item into an edition and manage the individual edition items.
To transact the item click the edit button ![]() and the transaction screen will load. To sell, consign or reserve an item, click the Status dropdown and set it accordingly. This will reveal other fields for the details of the transaction (price, customer, date, etc). Don’t forget to save any changes.
and the transaction screen will load. To sell, consign or reserve an item, click the Status dropdown and set it accordingly. This will reveal other fields for the details of the transaction (price, customer, date, etc). Don’t forget to save any changes.
If an item is sold, reserved or consigned some additional buttons will also be available. To print the relevant transaction document (invoice, consignment note, etc) click the print button ![]() . If you prefer to email the document (and you have the customer’s email address), click the email button
. If you prefer to email the document (and you have the customer’s email address), click the email button ![]() and the document will be emailed.
and the document will be emailed.
The “Images” tab
Artlook allows you to upload as many images as you wish for an item. For a 3D work, the use is clear. However you might wish to load details of a 2D work or even images of certification. Be aware that any images uploaded in this way will be displayed in a carousel on an Artlook Template web site.
To upload additional images click the Add Images button.
![]()
You can change the image sequence by dragging and dropping the images. If you move an image to first position this will become the main image for the record. Don’t forget to save your sequence by clicking the Save sequence button
![]()
You can also display all the images as a Slide Show by selecting the View as Slideshow button.
The “Groupings” tab
This shows you any groupings to which you have added the item. You can also remove the item from groupings here or add to a new grouping.
The “Uploads” tab (Studio Pro only)
This allows you to upload, store and retrieve PDF documents (and also video files) with the item.
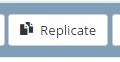
Replicate
The Replicate function allows you to take an existing record and create a new one based on its core attributes (title, price, description, medium, tags, image, etc). Just click the replicate button, edit the result to your needs and Save the new record.