Please note you should first read the Knowledgebase article on Web sites.
If you are using the Artlook Online web site (it is available free of charge to all users) then you will need to configure it here.
The first group of settings enables you to choose a web template and then style it:
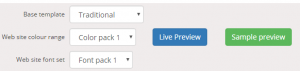
It is a good idea to click the green button to turn on Sample preview, then you can get an idea of the differences your selections would make. Choose your base template, then your color pack, then your font pack. You can also click the blue Live preview button to see what your site actually looks like in a browser but you will need to have Groupings set up in the correct way (that’s why you need to read the Web sites Knowledgebase article first!).
Then you can choose whether or not to show your logo on the web site. If you don’t (perhaps you don’t have one or it is not high enough quality) then your name will be displayed instead, in a prominent and stylish typeface.
You can choose to show or not show prices on your web site. Many artists prefer not to show prices because a gallery will charge a different amount and this is confusing for the public.
Then you can rename the pages (and their connected menu items) for home page, exhibitions page, galleries page, and biography page. If you are unclear what these are, then again you should read the Web sites article. If you don’t want a biography page, uncheck the box – the other three pages are obligatory provided you have configured the relevant Groupings.
The Google Maps location enables you to show a map of where you are on your Contact page. Copy the embed code in its entirety from GoogleMaps and paste it in here.
Meta key words and meta description are very important for search engines when they index your site. For examples, search Google for these terms (“web page meta data”).
Don’t forget to save your changes!